
I decided to start this blog with my last creation: a water rocket launcher powered by a RaspberryPi.
It’s been a few years by now that I’m experimenting with water rockets; following tutorials from this cool Italian website and from the website of the Australian’s Air Command Water Rockets i initiated myself to this really cool summer hobby.
The first rockets i made were just a bunch of coke bottles fitted with a bike air valve who took off as soon as they reached enough pressure to pop the valve away; it was fun, i mean, really! But they didn’t fly more than 10-15 mt in height. I then decided to move to a more “professional” system, the “Gardena launcher” system. This consists in a Gardena hose connector, which is kept vertical by any means you can imagine and on which you attach your rocket, whose cap has been modified to fit the second part of the Gardena connection system. This way the launch will happen only when you actually pull down (or rotate as you will see) the Gardena connector allowing you to increase the pressure in the bottle pretty much as you want. This leads to a controlled launch (it’s you that control the take off instant) and to flight height that is limited only by the pressure source you have available and the resistance of your rocket bottle.
I had then to decide how to mount the Gardena connector vertically; i came to the below solution which implied a small rectangular wood table, a “L” plumbing connector, a garden valve, a normal garden hose and of course our Gardena connector.

Of course as you can imagine a wood table to serve as a support for a water rocket launching system isn’t the smartest option i had. In fact after just a couple of launches i had to dismiss the wood table for “health problems”. It just went really fat and unusable.
I had to solve this problem with a water-resistant material, but i needed it to be also easy to work with, seen that all of my instruments are hobby grade ones. So what’s better than plexiglass? I love working with plexiglass, for various reasons, in the first place because it’s as easy as wood to work with but offers great resistance for a really thin plate and in the second place because i love transparent materials.
So i moved all of my launching system on the new plexiglass board but i decided not to mount the bar used to drive the launch string.
You may by now think “Ok, that is great, but what has this to do with RaspberryPi?” don’t worry, I’m coming at it now.
Why i didn’t mount the bar? That’s pretty simple, I just had an intuition: “What if I take a RaspberryPi, my Edimax EW-7811 nano wi-fi adapter and a servo motor and I combine them to be a remotely controlled launch system?” and so did I.
Ok, after the “little” story introduction it’s now time move to the real topic of this post, our RaspberryPi powered WR launching system.
With the launching structure already made i had to found a servo motor strong enough to pull the launching string with the Gardena under pressure to launch the rocket. I bought also a RaspberryPi a Sony cycle phone reserve battery to make sure the Pi could work untethered while the EW-7811 wi-fi adapter was already in my possession.
My item list:
- RaspberryPi
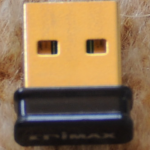
- Edimax EW-7811 (already in my possession)
- Sony Cycle battery charger

- Super strong servo motor

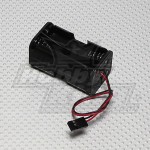
- 4xAA Battery holder to power the servo motor with 6V CC


Now. I had all the items, but that’s completely useless if you don’t know how to use them, and in my case I had no idea of how a servo motor works nor in which way I will have to mount them in the final structure. I then started from the informatics part of the problem to solve only later the structural one.
RaspberryPi and a Servo Motor controlled by the Web
I knew this would have been the most difficult part of the project, and it did, mostly because there is always something that doesn’t work the way I’d like when i have to work with Linux. And it did.
So i had to figure out as first thing how to connect to the Pi also when i had no wireless available, the best way was to create a wi-fi hotspot from the Pi and to connect to it with the Mac. Easy to say not so easy to get working, at least at first. I found this (archive.org)great tutorial from Lasse Christiansen on how to create a wi-fi hotspot in no knew network is available; i followed it one, two, even three always on new raspbian installs but it didn’t work; the dhcp server never leased an ip. So i decided to leave away the connect to known networks if available and just create a hotspot every time the Pi turned up. This (archive.org) guide was just what i needed, clear with just the software i needed for this project and it worked perfectly.
So now that i could connect on a same network as the Pi there was the need for a web interface to control the launch of the rocket. After installing a LAMP server (Linux Apache MySQL Php Server) those install steps i skip ’cause it’s plenty of guides on the web for it, i came up with an interface to control the rocket launch.


You can find the interface and the controlling script here on github.
The next step was to actually move the servo motor on the webpage load; to do so i called a shell script (servoblaster) containing the instructions to move the servo motor with exec() from php which needs running as root, but for this use case security is not really a concern (but beware if you think on keeping it connected to the internet, you do not want to contribute to this).
That’s all software wise, once verified that the web-server, the hotspot & the servo controller were installed correctly (cf. https://github.com/richardghirst/PiBits for documentation of servoblaster).
Running the Servo motor
The pi is obviously not powerful enough to drive a servo motor from the gpio pins, to solve this i used a simple transistor in order to use the pins to control the flow of current from 4 AA batteries.
Once that was also all done, i connected everything together, and behold… it worked!
The last point was to ensure that as this was a WATER rocket, all the electronics were safe ?.
The solution? A Tupperware! (Don’t judge the color, they only had that in the store).
I don’t really remember how i got the idea (i’m writing this last part in 2017, for this archeologic post), but it seemed like one of those “stupid but it works” ideas, so i went with it. I found a sizable Tupperware and put all the components inside, blocking everything in place with a mixup of hot glue and screws.
The servo motor itself is mounted on top of a plexiglass “tower”, with just the cable coming off one side of the Tupperware.
The Tupperware was then fixed to the plexiglass plate with some screws and a lot of hot glue, the latter mostly to waterproof the holes i did in the Tupperware.
And that was it! Once everything was glued and screwed and locked (you got the idea) the rocket launcher was promptly taken outside.
It was just beautiful. A Pi used to launch rockets, i should have gotten an internship at NASA (sometimes i think i’m too modest), or SpaceX, bet they use raspberries to control their barges.
Unfortunately this being some time ago i’ve lost the videos of the launches, i’ll do some as soon as a sunny weather decides to show up, in the meantime, enjoy some initial renderings of how i thought the project should have been:

