
It’s been a while since i started playing with Hyper-V and even more since I was introduced to the virtualization world.
I started around 8 years back when i wanted to give a second try to the Linux world but without risking destroying the main partition of a production laptop while installing the system (To my past self: Use the whole disk means “The WHOLE disk”). Thanks to VirtualBox I managed to get Linux installed and get immersed in that new world. Since then i installed, reinstalled, rereinstalled etc… plenty of different distros, from Ubuntu to Kali to the forensics oriented CAINE
When i decided to start building a homelab obviously i had the rough choice of deciding which hypervisor to use as base: hyper-v, esxi, xen, or kvm with a virtualization oriented distro like Proxmox… Plenty of choice, and a difficult one, in the end once you start with a hypervisor the change can be painfully, and i preferred to start with the right one for my needs right away. After plenty of testing I decided to lean on Hyper-V for two reasons: i knew it better than the others as i already tested it on Windows 10, and with the datacenter edition license i had i would have been able to activate as many Windows Server 2016 guests as needed.
So here we are, after having setup pretty much everything I’m sharing a first impression of the usage via GUI and a short dig in what i had to use of powershell. (As I’ve never used PS before i started doing things the “easy way”, although some may be in disaccord 😛 )
Installation
With Server 2016 Desktop experience, installing hyper-v is as simple as adding a feature and selecting “Hyper-V” (make sure to also install the managing tools in the following screens), then patiently making a good coffee and waiting for the server to automatically reboot.

Getting Started
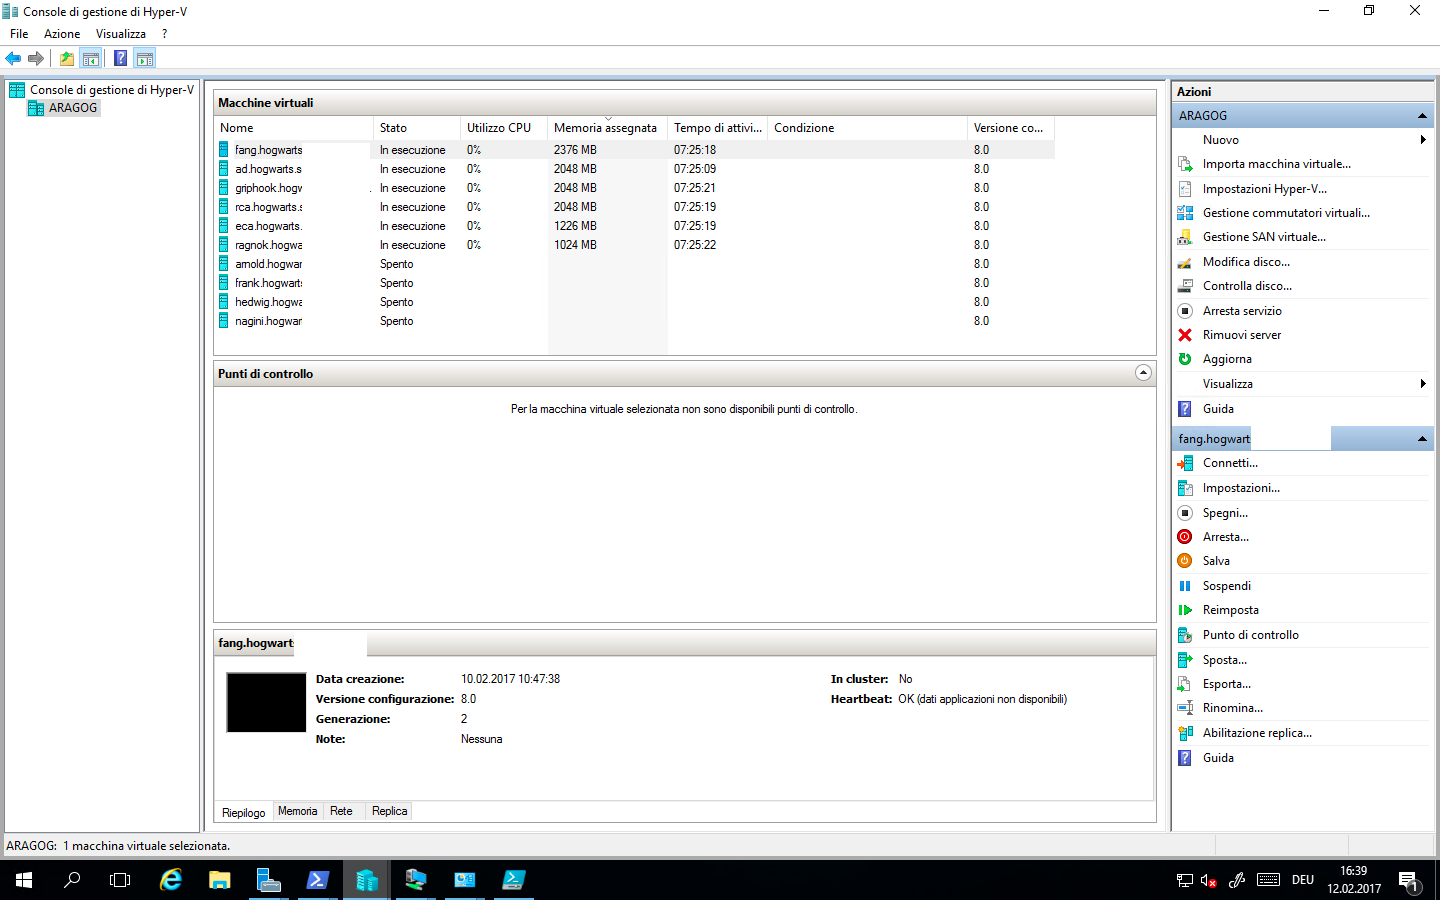
When the system is done installing it’s possible to login and open Hyper-V manager, where we will be doing the majority of the tasks.
Hyper-V Manager
Hyper-V manager is the default managing software for hyper-v, you can create and modify VMs, Virtual Switches, VHDs and more. It’s the main reference for those not familiar with PowerShell, but cannot afford the System Center Virtual Machine Manager suite. It has multiple limitations from SCVMM, but they can normally be overcome with a bit of PowerShell.
The first step you’ll want to do is create a Virtual Switch, in order to give the VMs internet access, and then create the different machines.
Hyper-V Networking
In Hyper-V three different vSwitch types are available in the GUI:
- External
- Internal
- Private
External: This Hyper-V switch creates a virtual switch connected to the VMs as well as to a physical nic on the host. If the host is to also use this nic, a virtual adapter connected to this vSwitch will be created on the host.
Internal: Virtual switch connected to the VMs AND the host but not to a physical adapter, allows to create a virtual network isolated from the physical one.
Private: As the internal switch, but the host is not connected to it, it creates an isolated network for the VMs .
I generally go for external, as I want to be able to hook up physical devices to the network.
Once you created the vSwitch you can proceed to create a VM.
VMs
In hyper-v there are two types of VMs, Gen1 and Gen2, the former is the oldest type, and while mantaining compatibility for legacy drivers doesn’t offer some more advanced integration features and UEFI support. As a rule of thumb if installing a recent windows system a Gen2 VM is suggested, whereas for a linux or BSD system a Gen1 is probably better, you can check on MS website if the linux distro is supported in a Gen2 VM. Keep in mind you cannot pass a Physical DVD to a Gen2 machine.
Once the VM generation is selected, the virtual machine creation follows the normal pattern, with selection of HW resources, the location of the VHD and the install media.
The VM now created should be visible in the main screen, from there it’s possible to select it and do a handful of action from the sidebar, including booting, connecting to a virtual KVM screen, changing the VM settings and more…
Pros and Cons
You’ll likely want to play a bit around with hyper-v in order to get better acquainted that my relatively short intro, and see for yourself the pros and cons of hyper-v; nonetheless, here’s what i found out after a bit of poking with it:
Positive
Powerful hypervisor, available for free as a standalone system or as a part of any windows version >= Pro.
Easy of use: the VMs can be accessed directly with a virtual KVM or a “Remote desktop like” connection.
Negative
As soon as some more advanced configurations are required, you have to resort to PS or more advanced tools like SCVMM. (More on that coming in my experience with VLANs and vSwitches).
It’s Windows. Which means it has a fetish for rebooting every time an update has to be installed. This being the hypervisor, each reboot means all VMs are unavailable, and therefore a noticeable downtime, with updates taking as long as 1h (Last one i did 🙁 )… Why???

What’s to come?
In the next posts i’ll explain what i’m mostly doing with Hyper-V in my homelab, as well as the challenges found along the way, stay tuned!